Install an Open Virtual Appliance (OVA) Connector
Deploy the Connector as a virtual machine for your end users
- Updated on Apr 10, 2024
OVA Connector Overview
The Open Virtual Appliance (OVA) Install packages a Linux-based operating system (OS) with the Connector software pre-installed. This simplified install can be used when there is no available Linux machine to host the Connector and Docker cannot be installed on a Windows server. Admins can import an OVA file and provide a set of required parameters; once the VM is running, it will then have all that is necessary to run the Connector.
Note: Please work with Banyan to obtain the OVA file for installation.
Pre-requisites
Steps
Step 1: Create a Connector
1.1 In the Command Center, navigate from Networks > Connector > + Create Connector.
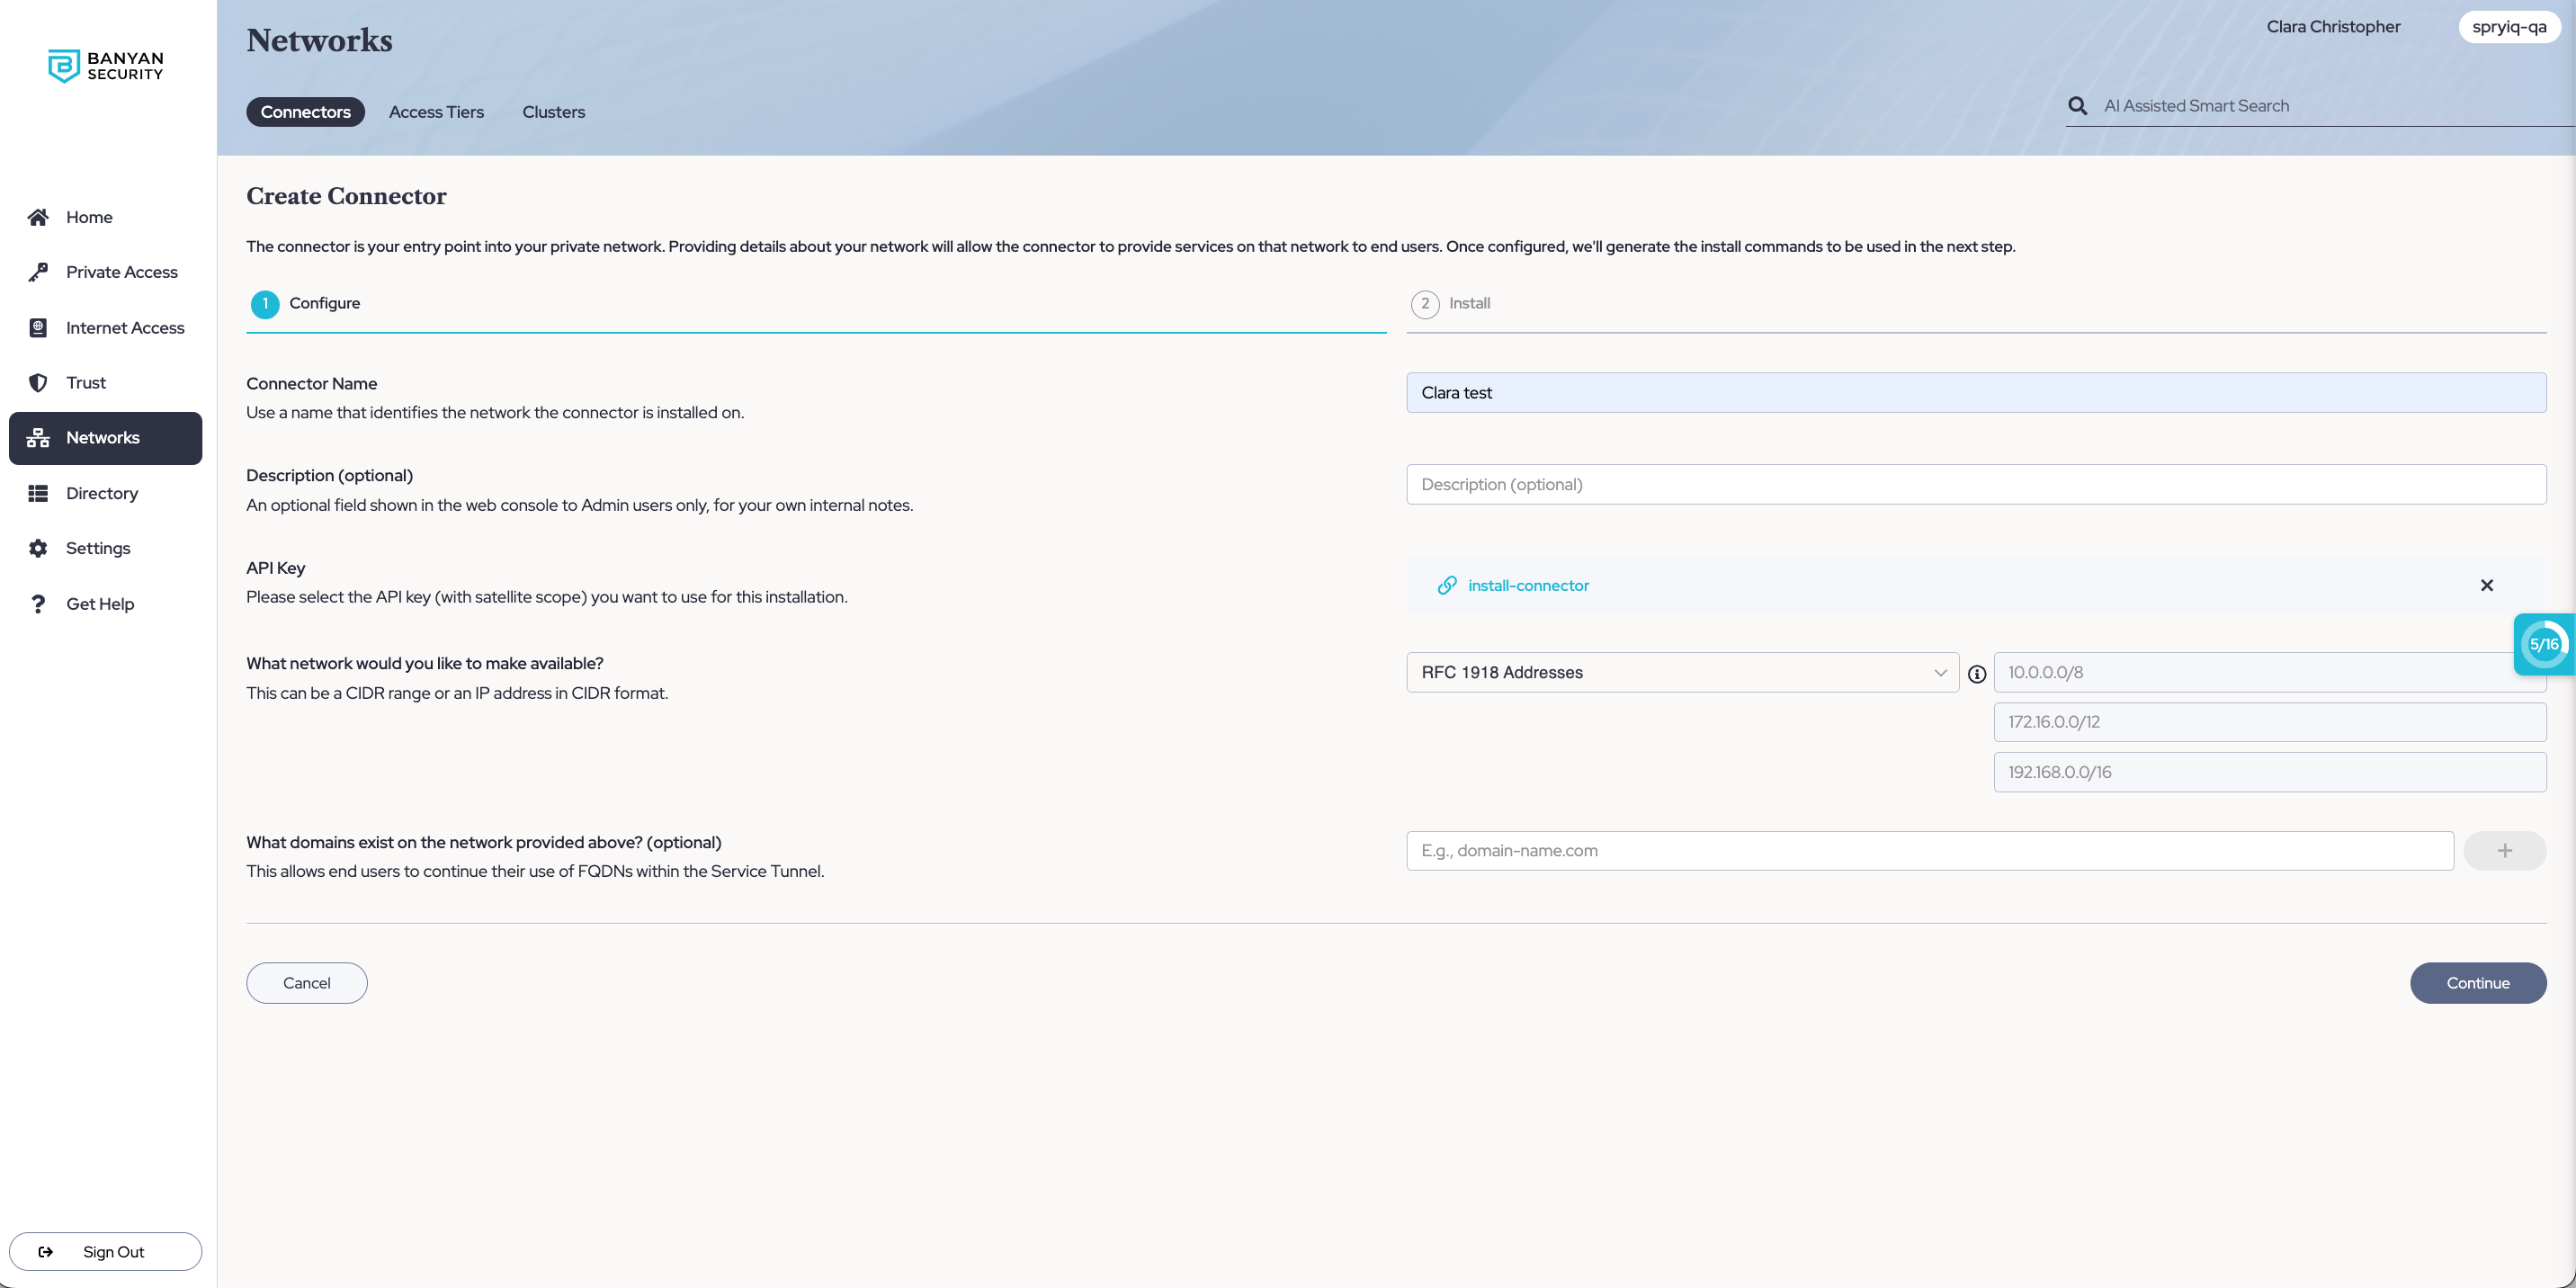
1.2 Under the Configure tab, name and describe your Connector. Ensure that an API key is selected for installation.
1.3 Select Continue.
1.4 Under Installation tab, select Windows as the Server Environment.
1.5 Select an Installation Method to use.

Step 2: Deploy the Open Virtual Appliance (OVA)
2.1 Upload a Connector OVA file to a virtual machine.
2.2 Copy the environment values from the Connector Installation tab (in Step 1), and paste these as values for your parameters in your OVA file.
Command Center URL: [VALUE]
API Key Secret: [VALUE]
Connector Name: [VALUE]
2.3 The OVA file contains two additional parameters: Host Name and User's password. Enter a host name value (e.g., my-connector) and chose a password or enter the default password, RANDOM.
Step 3: Validate the Connection
In the Command Center, the Connector reporting status will turn green and indicate that it is successfully reporting.
Troubleshooting
Log into your VM and use this Command to check logs: sudo cat /var/log/banyan/connector.log
Can’t find what you’re looking for?
We’re happy to help. Contact our team.