Use IDP Federation to enforce zero trust policies on all SaaS Applications integrated with Azure AD
Use federation capabilities in Azure AD to enforce Banyan policies and enable passwordless authentication for your SaaS apps
- Updated on Jan 08, 2024
- 15 minutes to read
-
Contributors

Overview
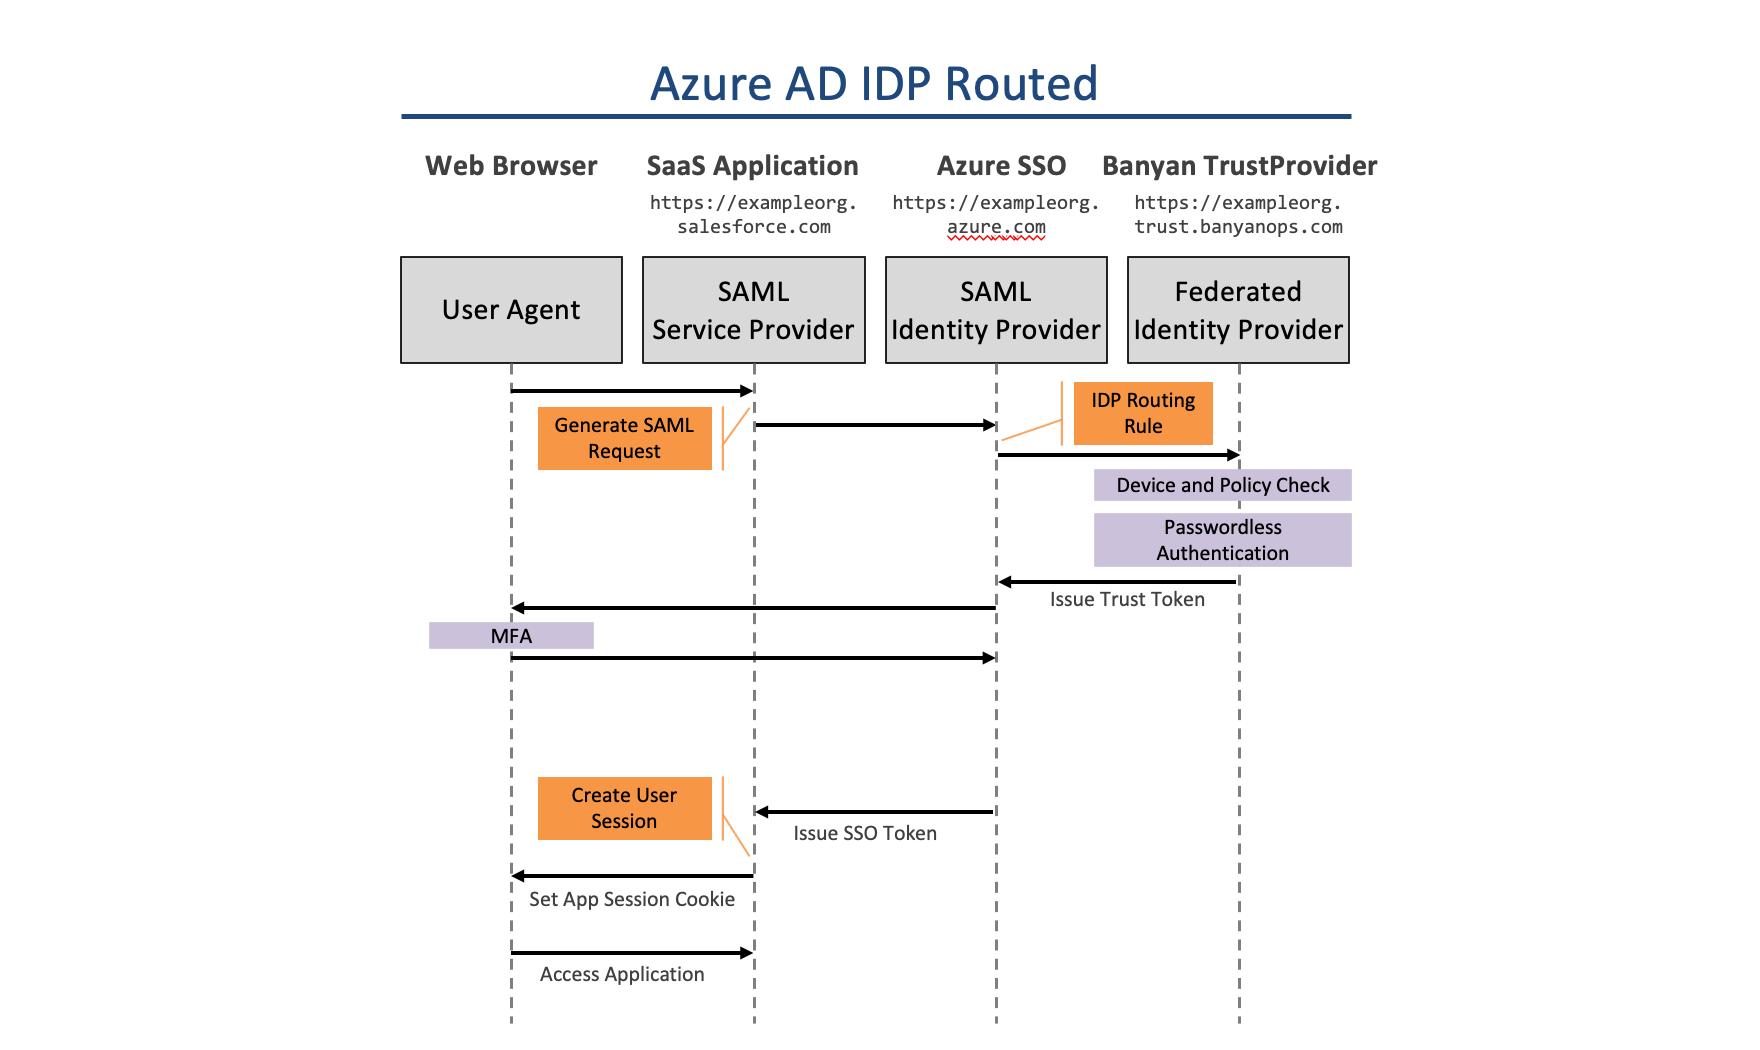
This guide details the steps required to set up Azure AD with Banyan to enable policy enforcement and passwordless authentication for any SaaS application.
Limitations
Based on current Azure AD operational models, capabilities have the following limitations, listed below.
- With passwordless authentication enabled, devices must be registered using MDM Zero Touch deployment. See more here.
- Domains in Azure AD must be federated entirely with Banyan. Domains cannot be segmented.
- All devices attempting to access applications federated with Azure AD when passwordless is enabled must be registered with Banyan.
- Device or user groups cannot be segmented by different authentication protocols.
How It Works
Prerequisites
Before proceeding through the steps below, ensure you complete the following:
- Configure AAD for Banyan Services
- Configure AAD for Banyan Device Registration
- Configure Zero Touch deployment with your MDM provider
Steps
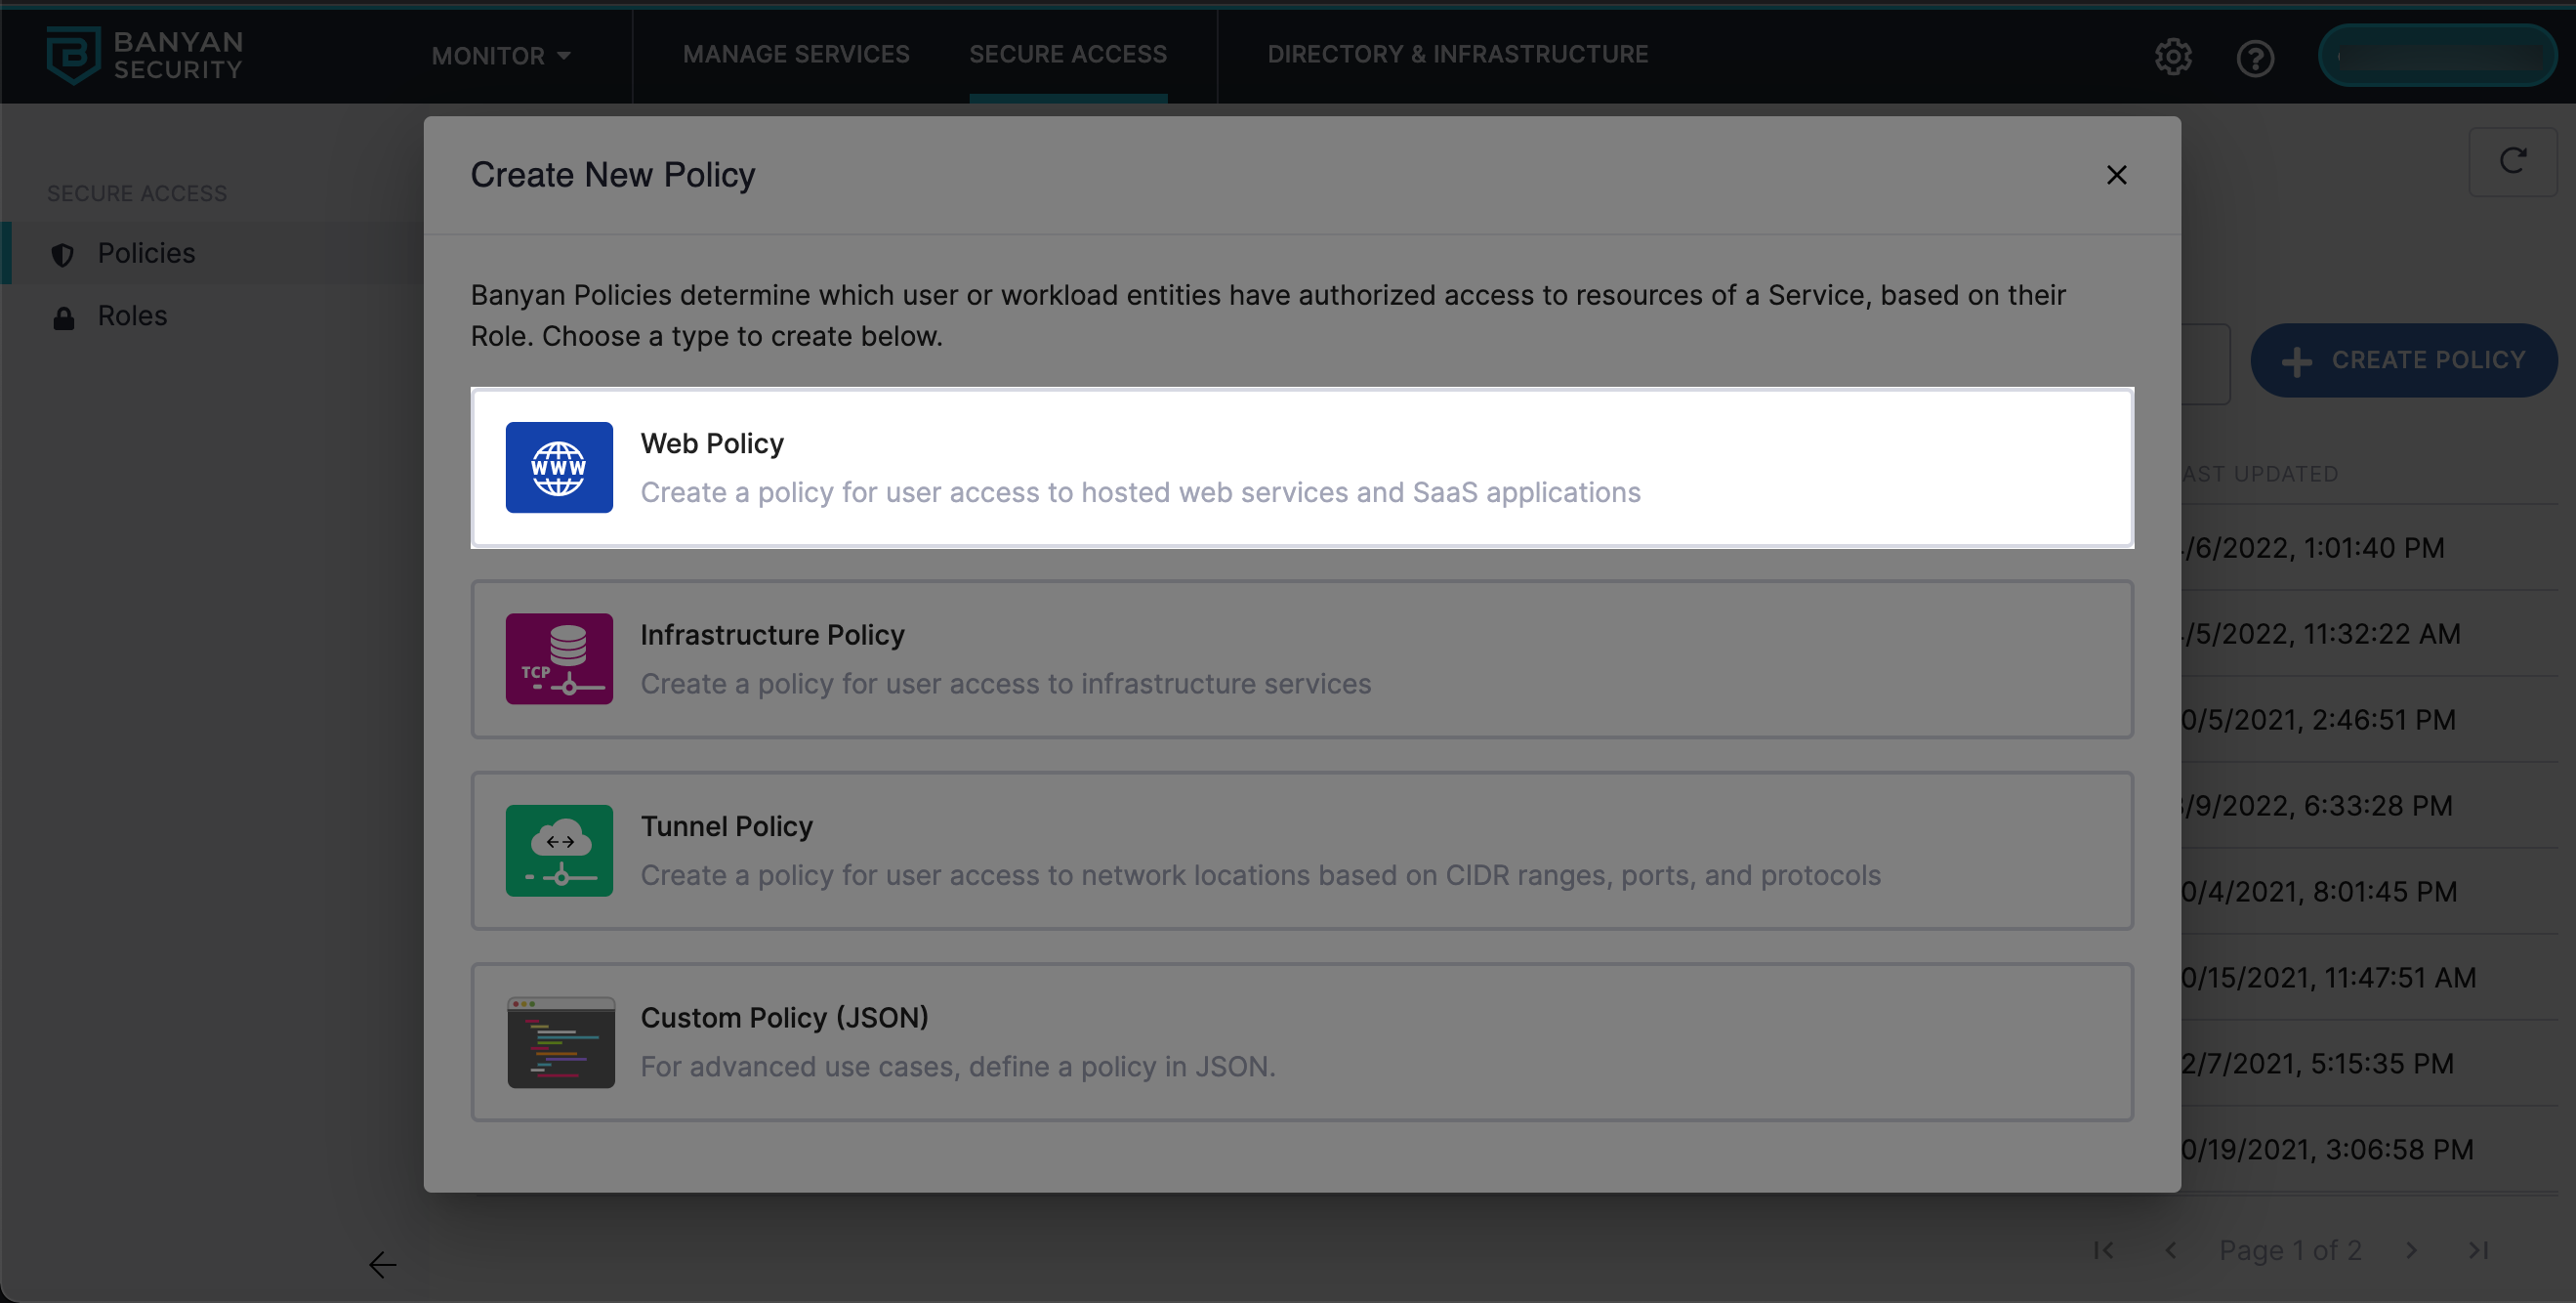
Step 1: Create a Web Policy
1.1 Navigate from Private Access > Access Policies > + Create Policy, and then select Web Policy.
1.2 Enter a policy name and description.
1.3 Set the recommended policy attributes.
- Role:
ANY
Note: Specific user and device assignment for SaaS applications is typically done at the IDP.
- TrustLevel:
High or Medium, if all devices will be registered with the Banyan app.
1.4 Select Create Policy.
Step 2: Create a SaaS application in Banyan
Currently, Microsoft does not support OIDC applications; it requires SAML as the authentication protocol.
2.1 Navigate from Internet Access > SaaS Apps. Select the Publish SaaS Application button.
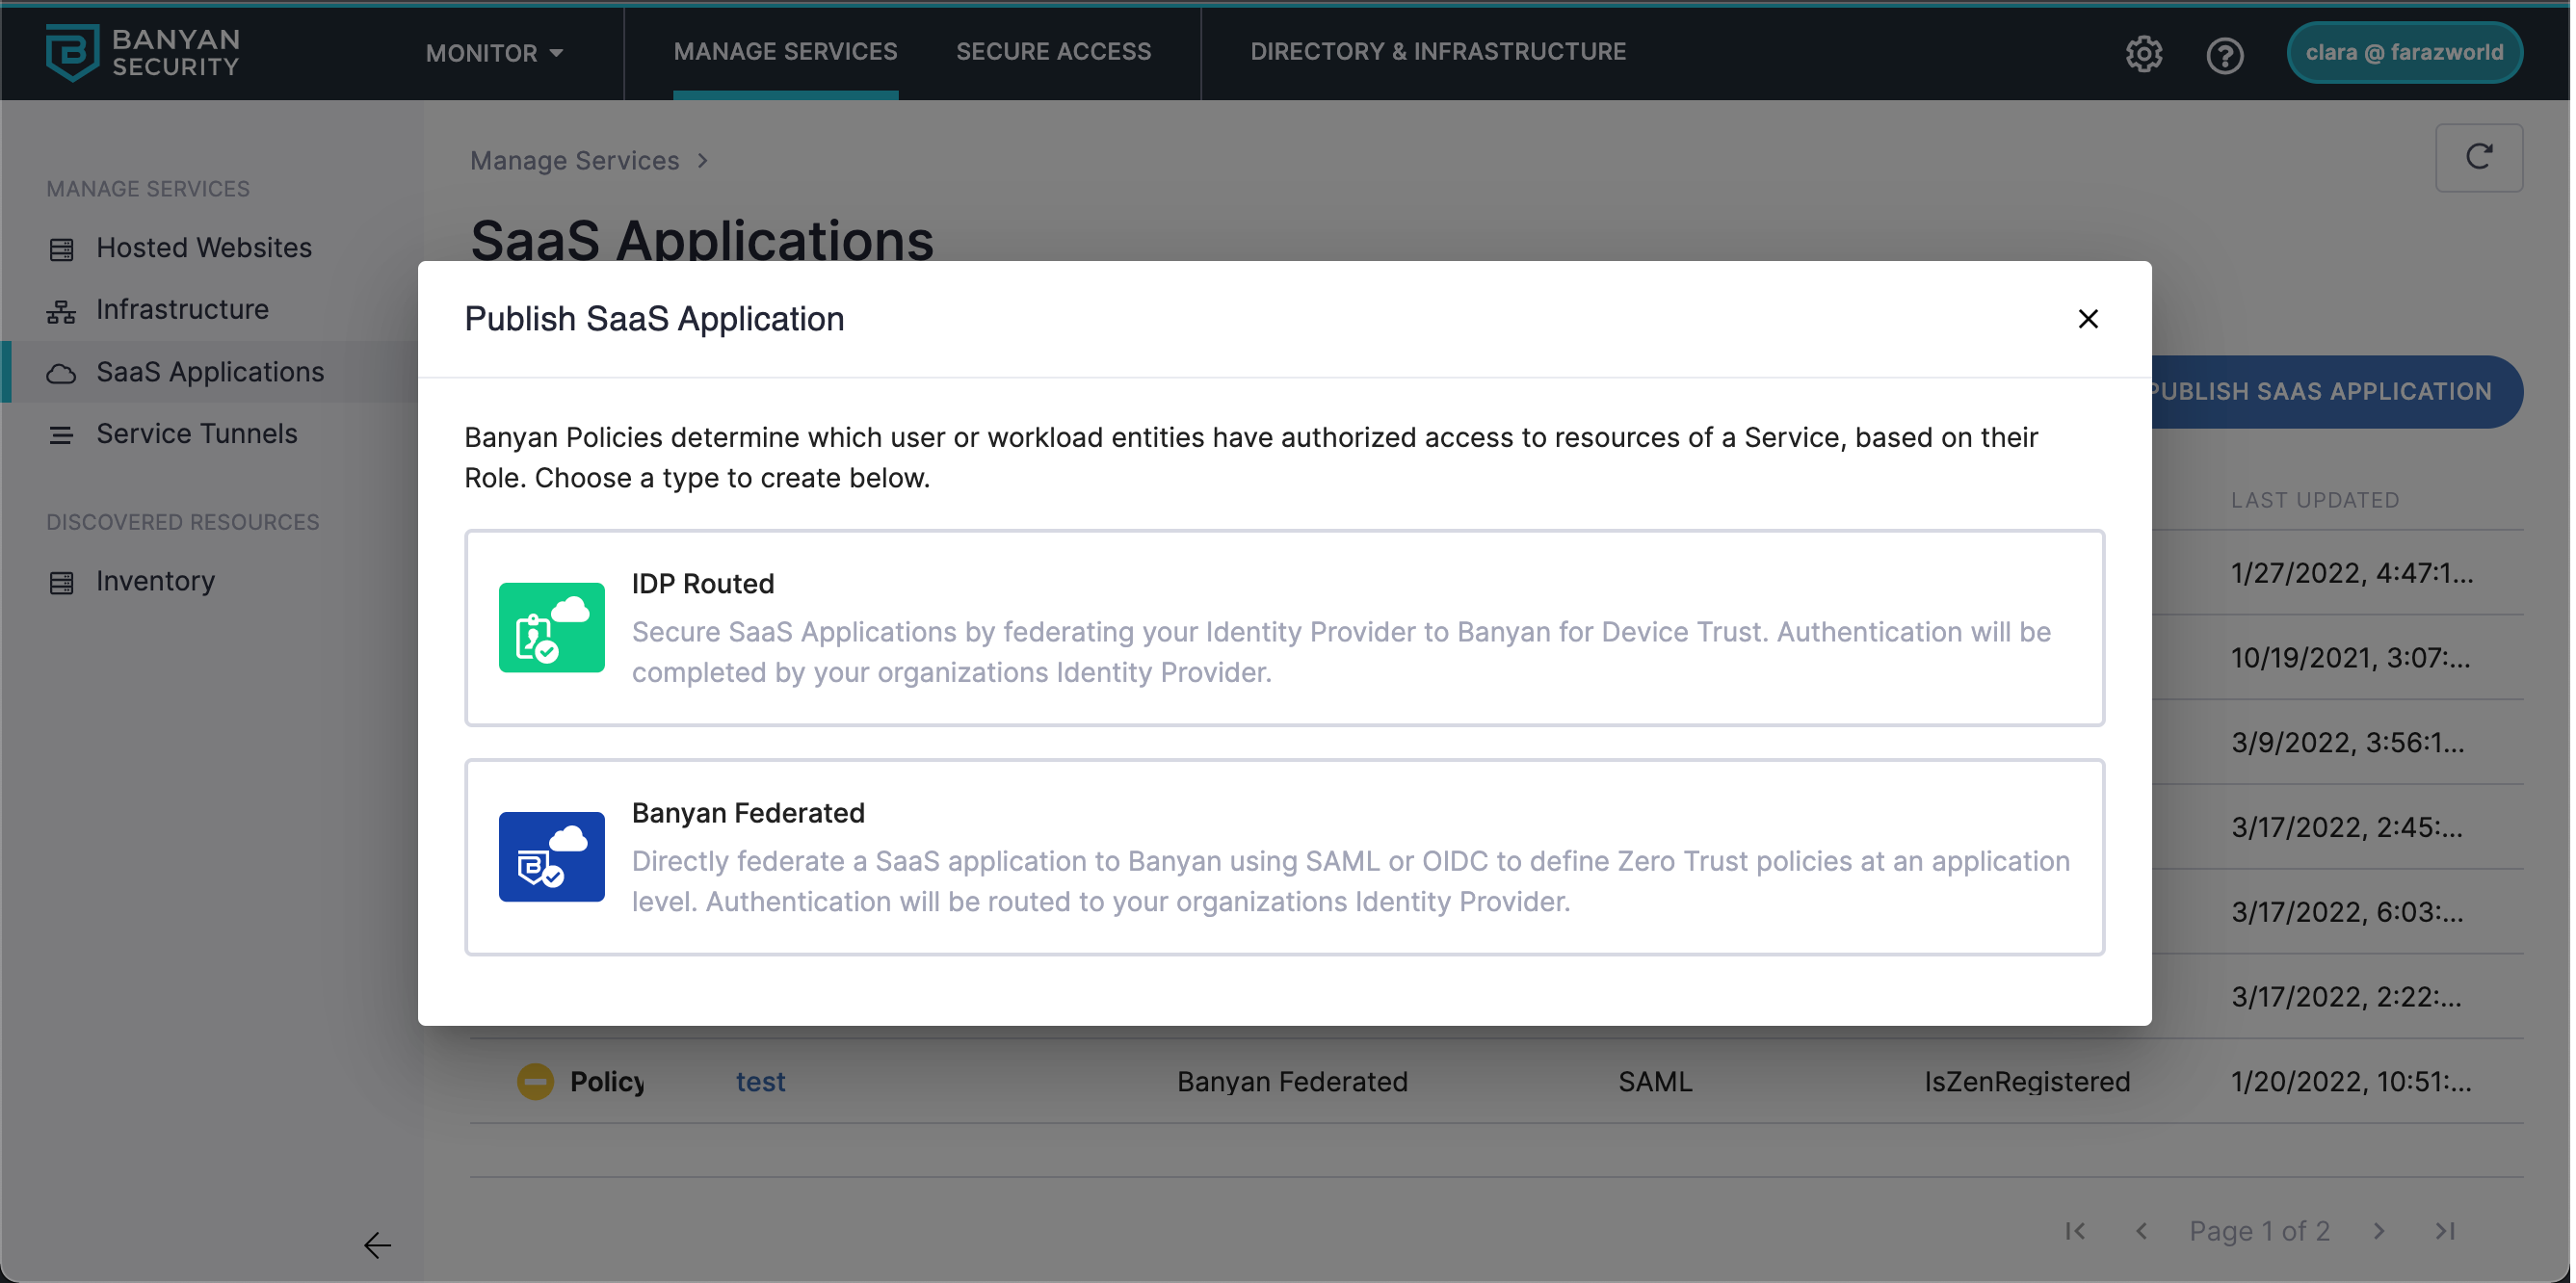
2.2 Select IDP Routed template for Azure AD to route to Banyan.
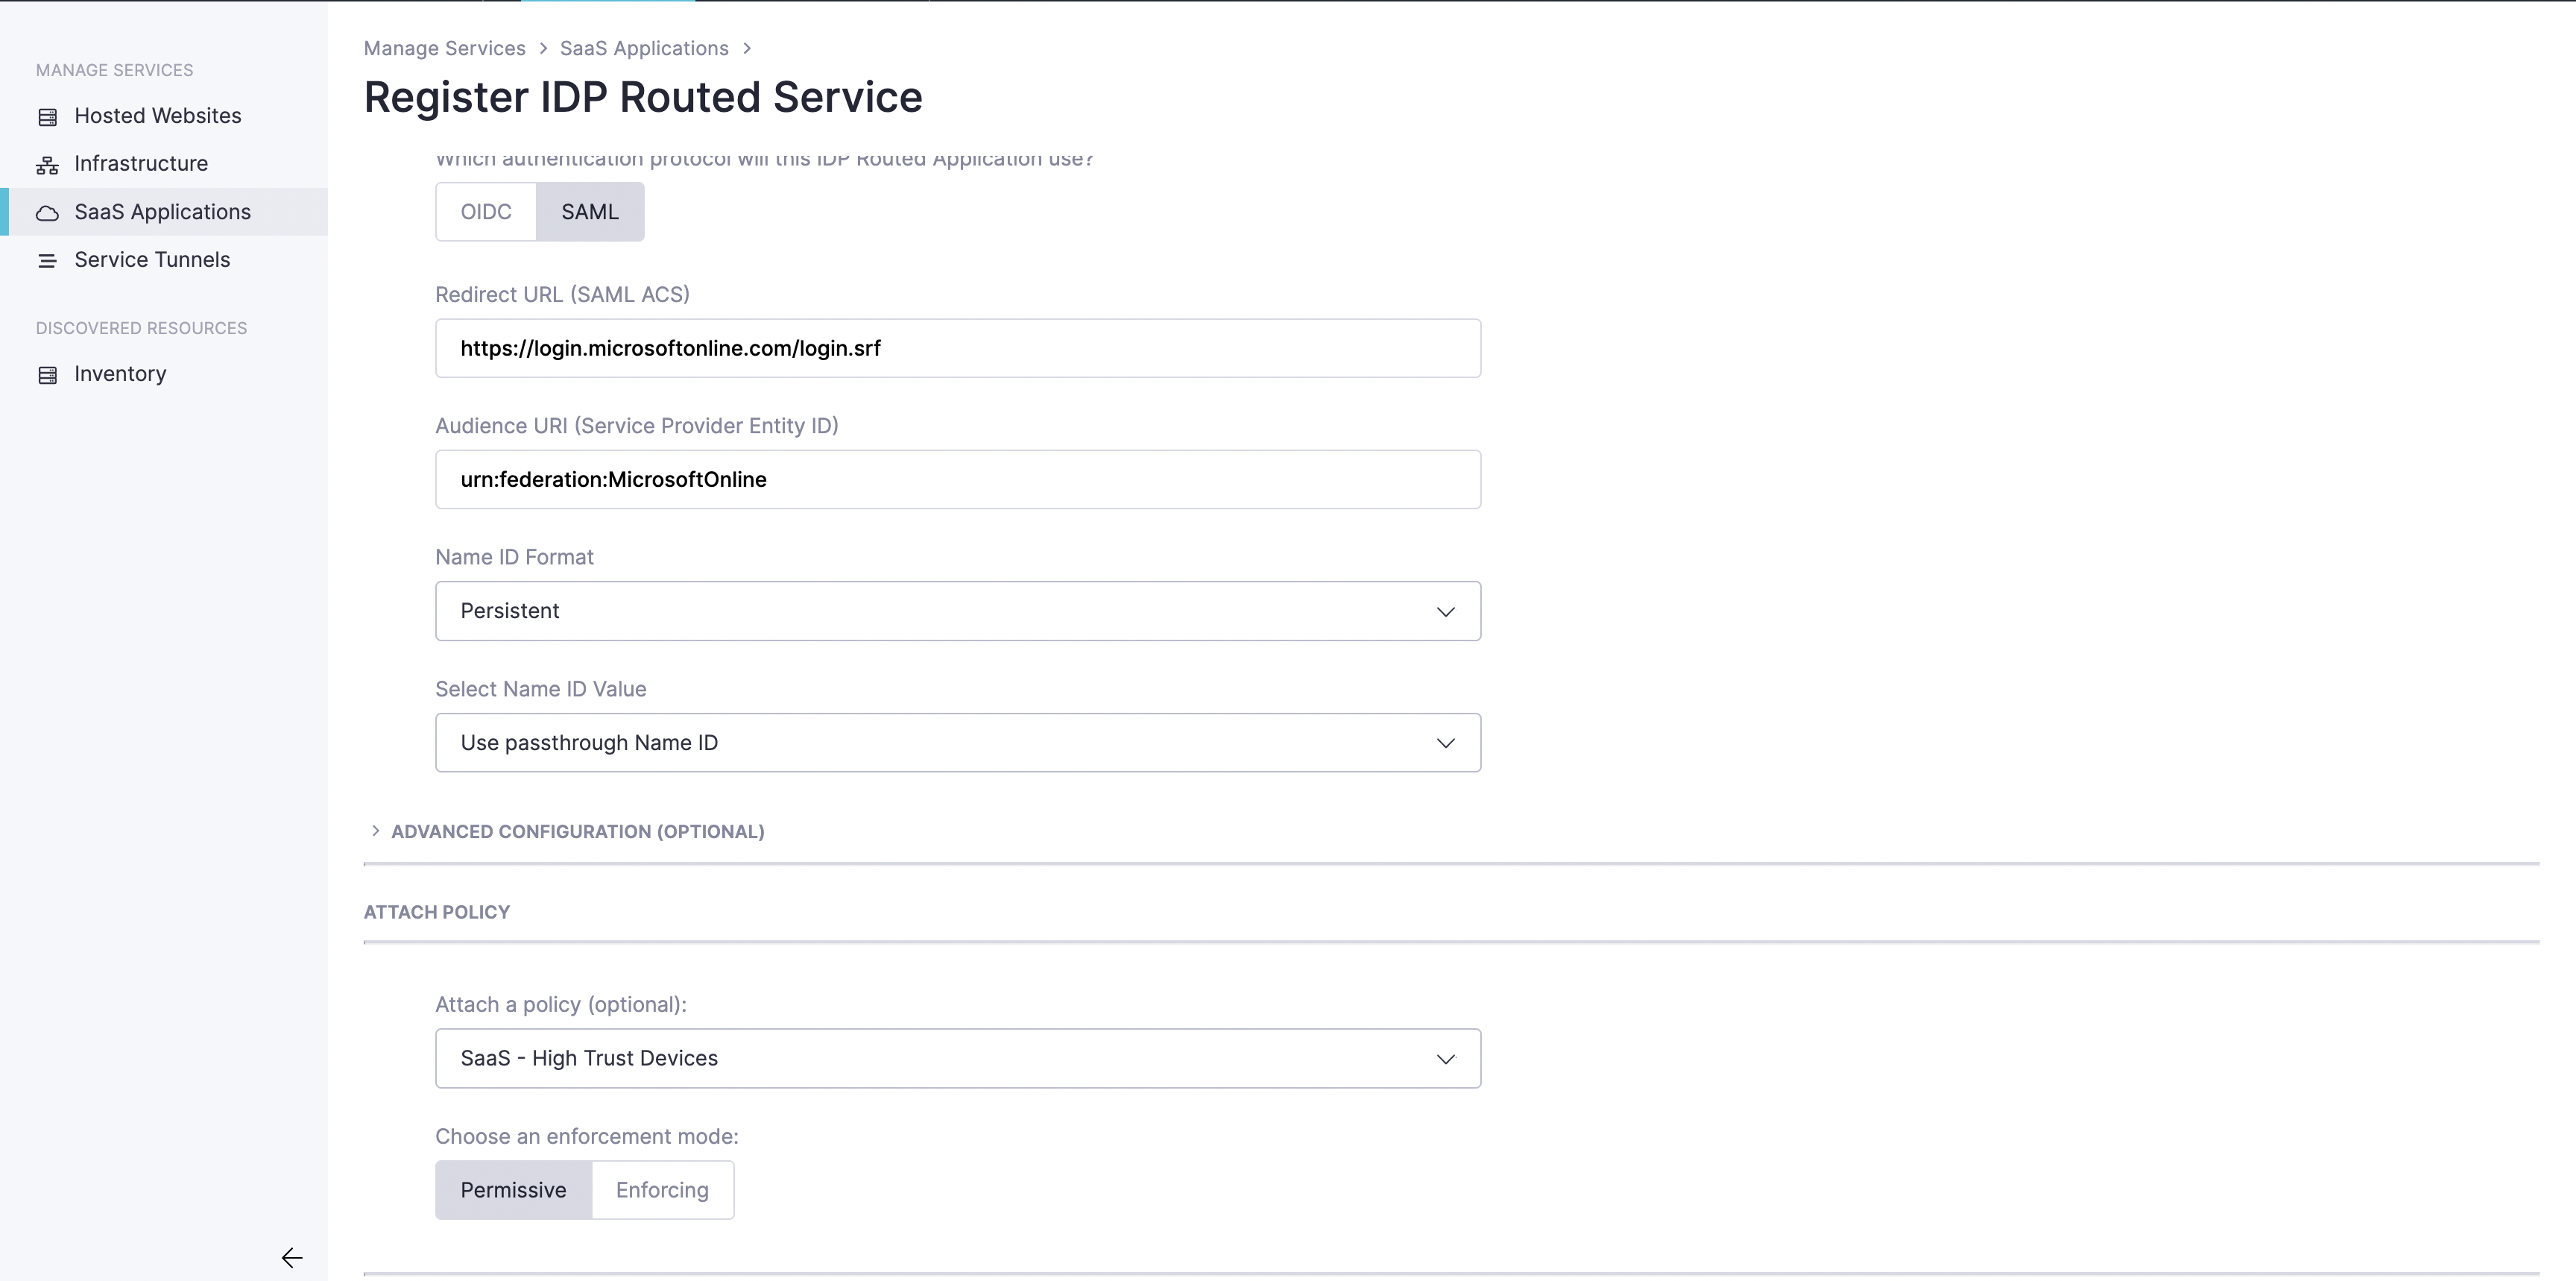
2.3 Name the SaaS app, and select SAML as the authentication protocol.
2.4 Enter “https://login.microsoftonline.com/login.srf” as the Redirect URL.
2.5 Enter “urn:federation:MicrosoftOnline” as the Audience URI.
2.6 Attach a web policy (Step 1.4), and set Enforcing.
2.7 Expand Advanced Configurations (optional), and enable Passwordless Authentication.
Although stated as optional, this setting is required due to Microsoft limitations for IDP federations. For more information about passwordless authentication, visit here.
The next screen will give you the details you need to set up Azure AD and use Banyan to enforce your policies.
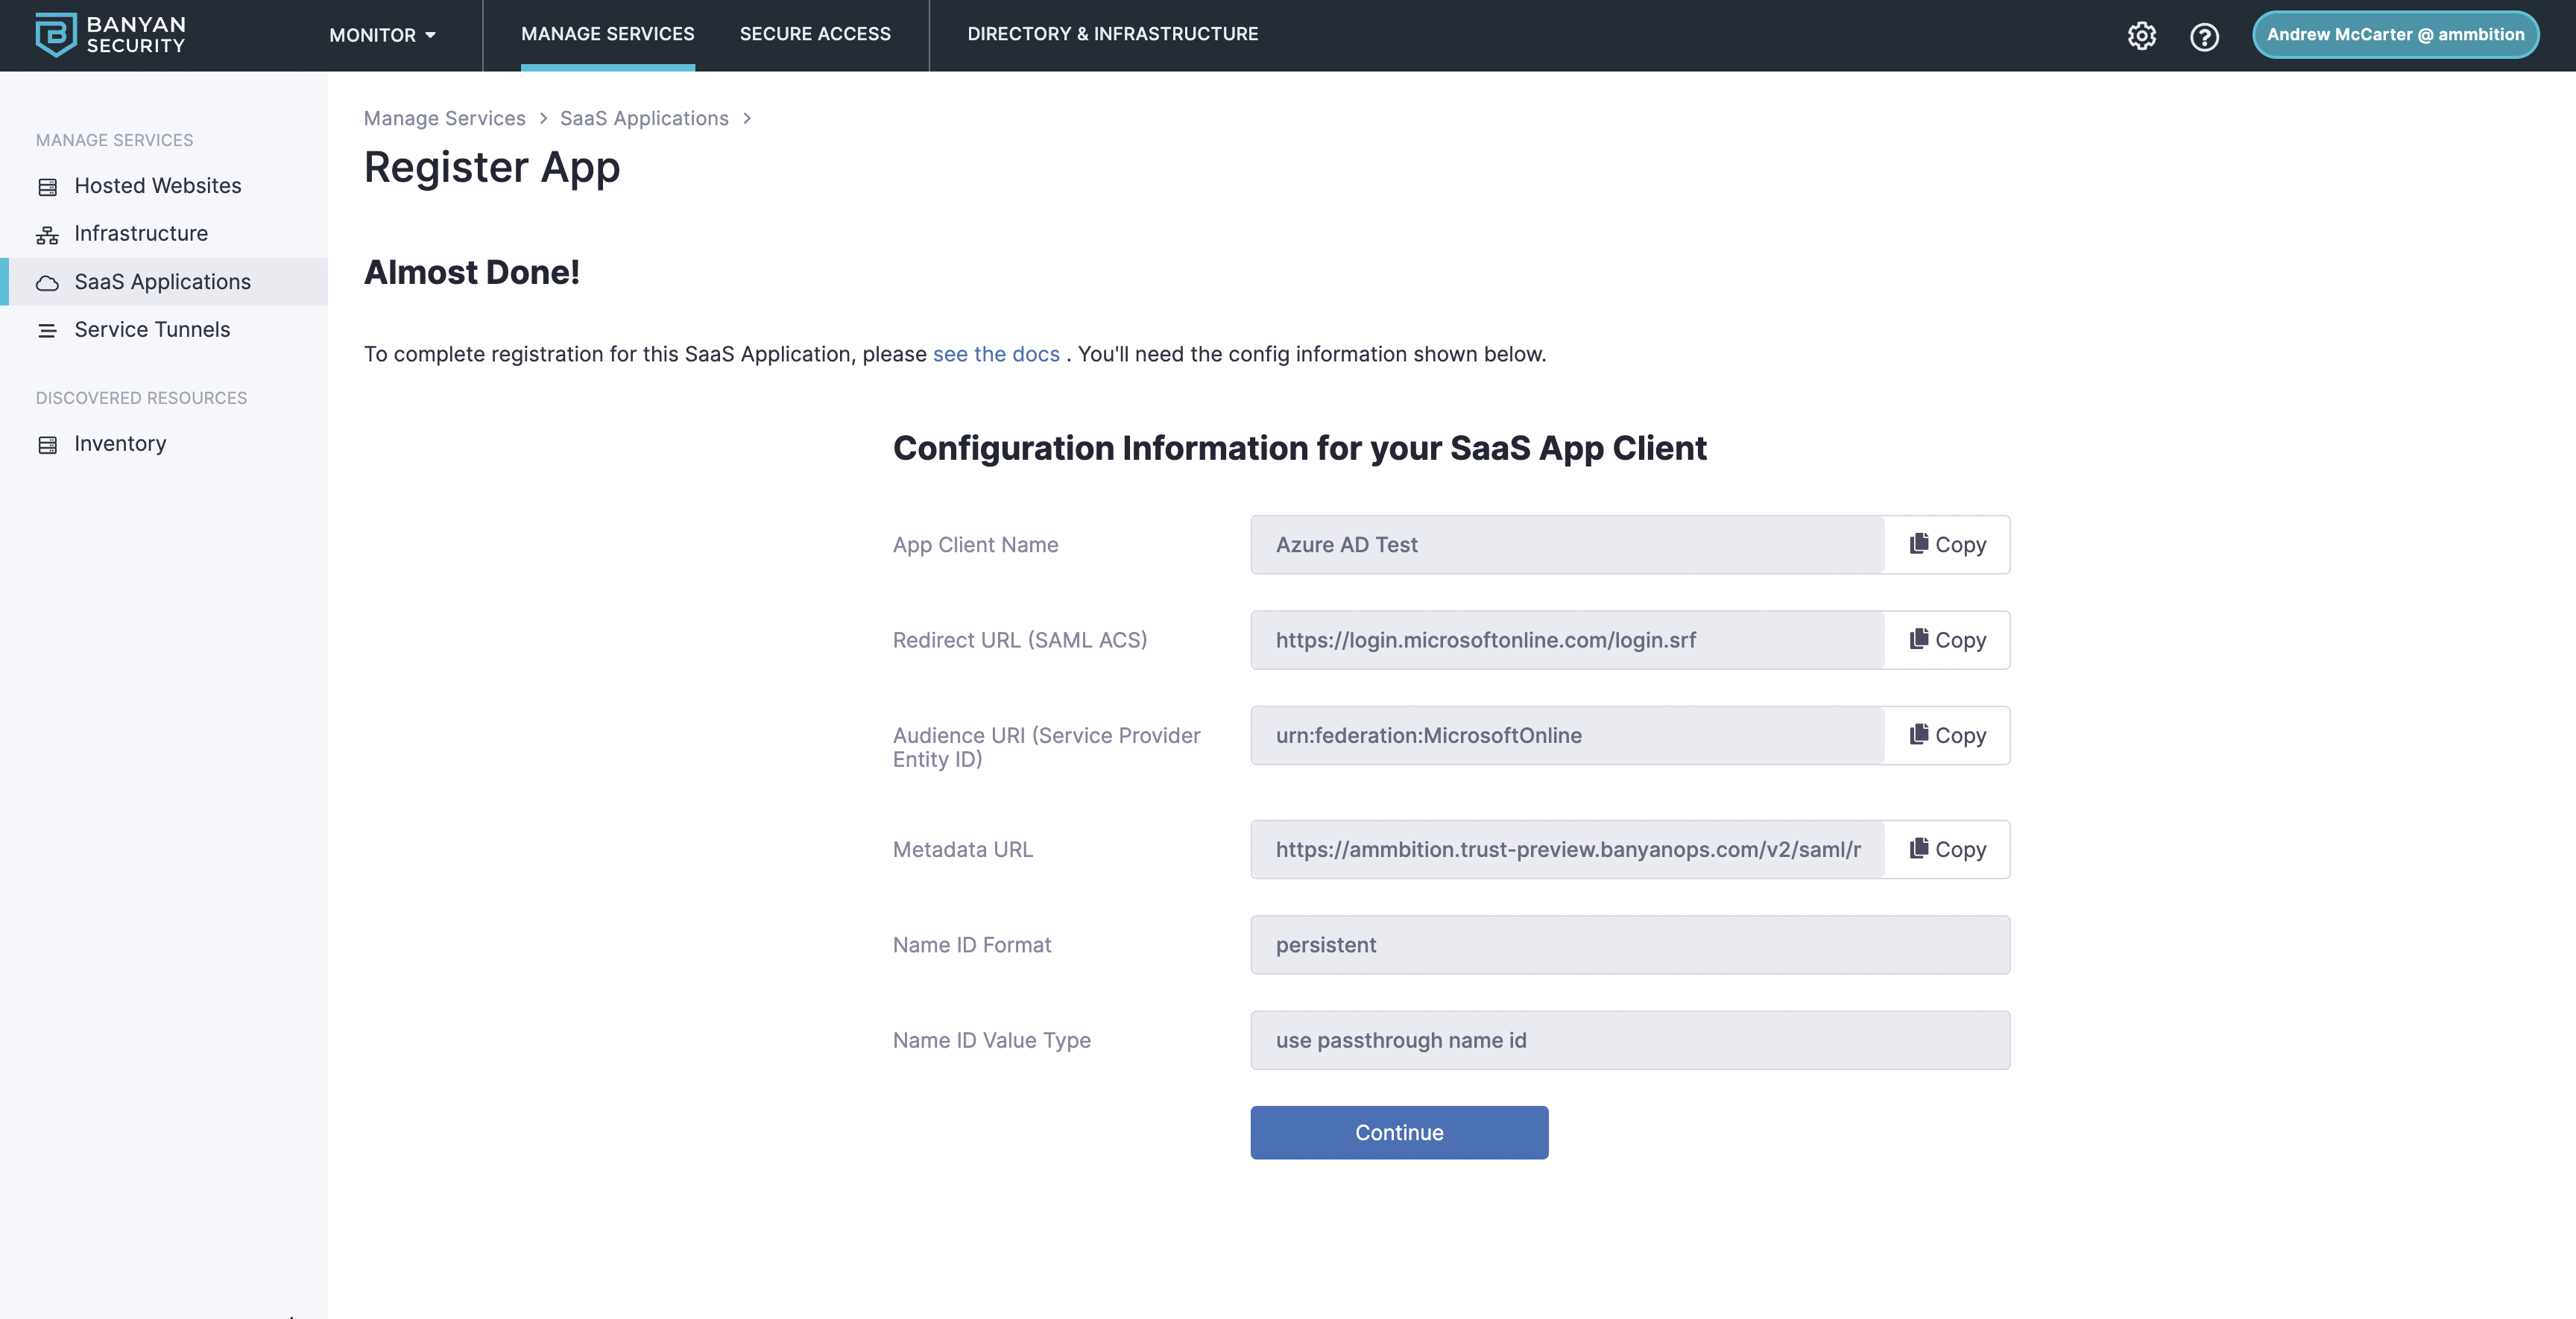
2.8 Select Register.
Step 3: Create Banyan as an Identity Provider in Azure AD
Note: The following steps are provided under the assumption that no previous Identity Provider has been set up in your AAD environment. Some steps could change if previous Identity Providers have been configured. It is best to consult Microsoft documentation for the most up to date best practices.
3.1 Navigate to your Azure AD SaaS app in Banyan.
3.2 Copy the metadata URL and paste it into a new tab in the browser.
- This should trigger a download of the file.
- Rename the file BanyanMetadata.xml
Note: If the metadata does not download, copy the XML on the webpage into a new file, saving it with the name BanyanMetadata.xml
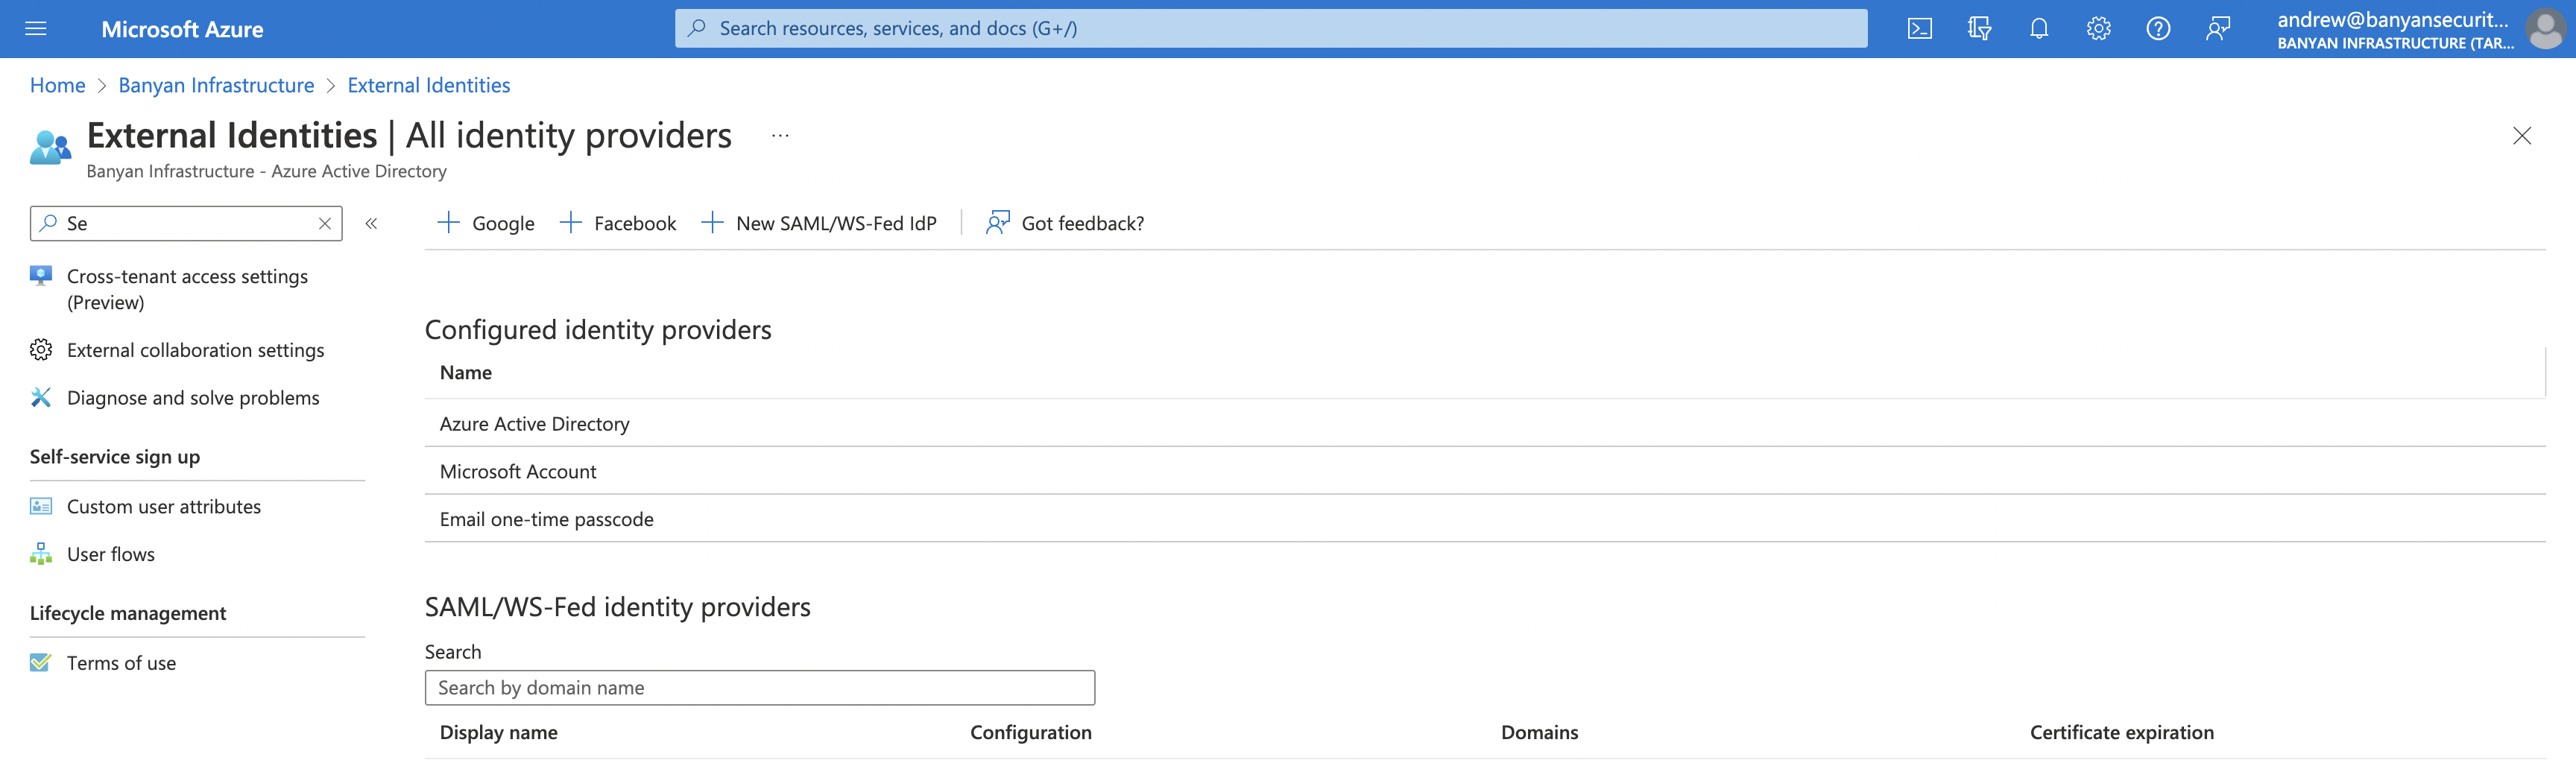
3.3 Navigate to Azure Active Directory.
3.4 Navigate from External Identities > Set up Identity Providers > view all Identity Providers.
3.5 Select New SAML/WS-Fed IDP
3.6 Enter the following information to create the Banyan Trust Provider as an Identity Provider within Azure.
-
These settings supply the configurations to map Azure AD to its trusted identity providers.
Display Name: Banyan Trust Provider
Identity Provider Protocol: SAML
Domain name of federating IDP:
<ORG_NAME>.trust.banyanops.com
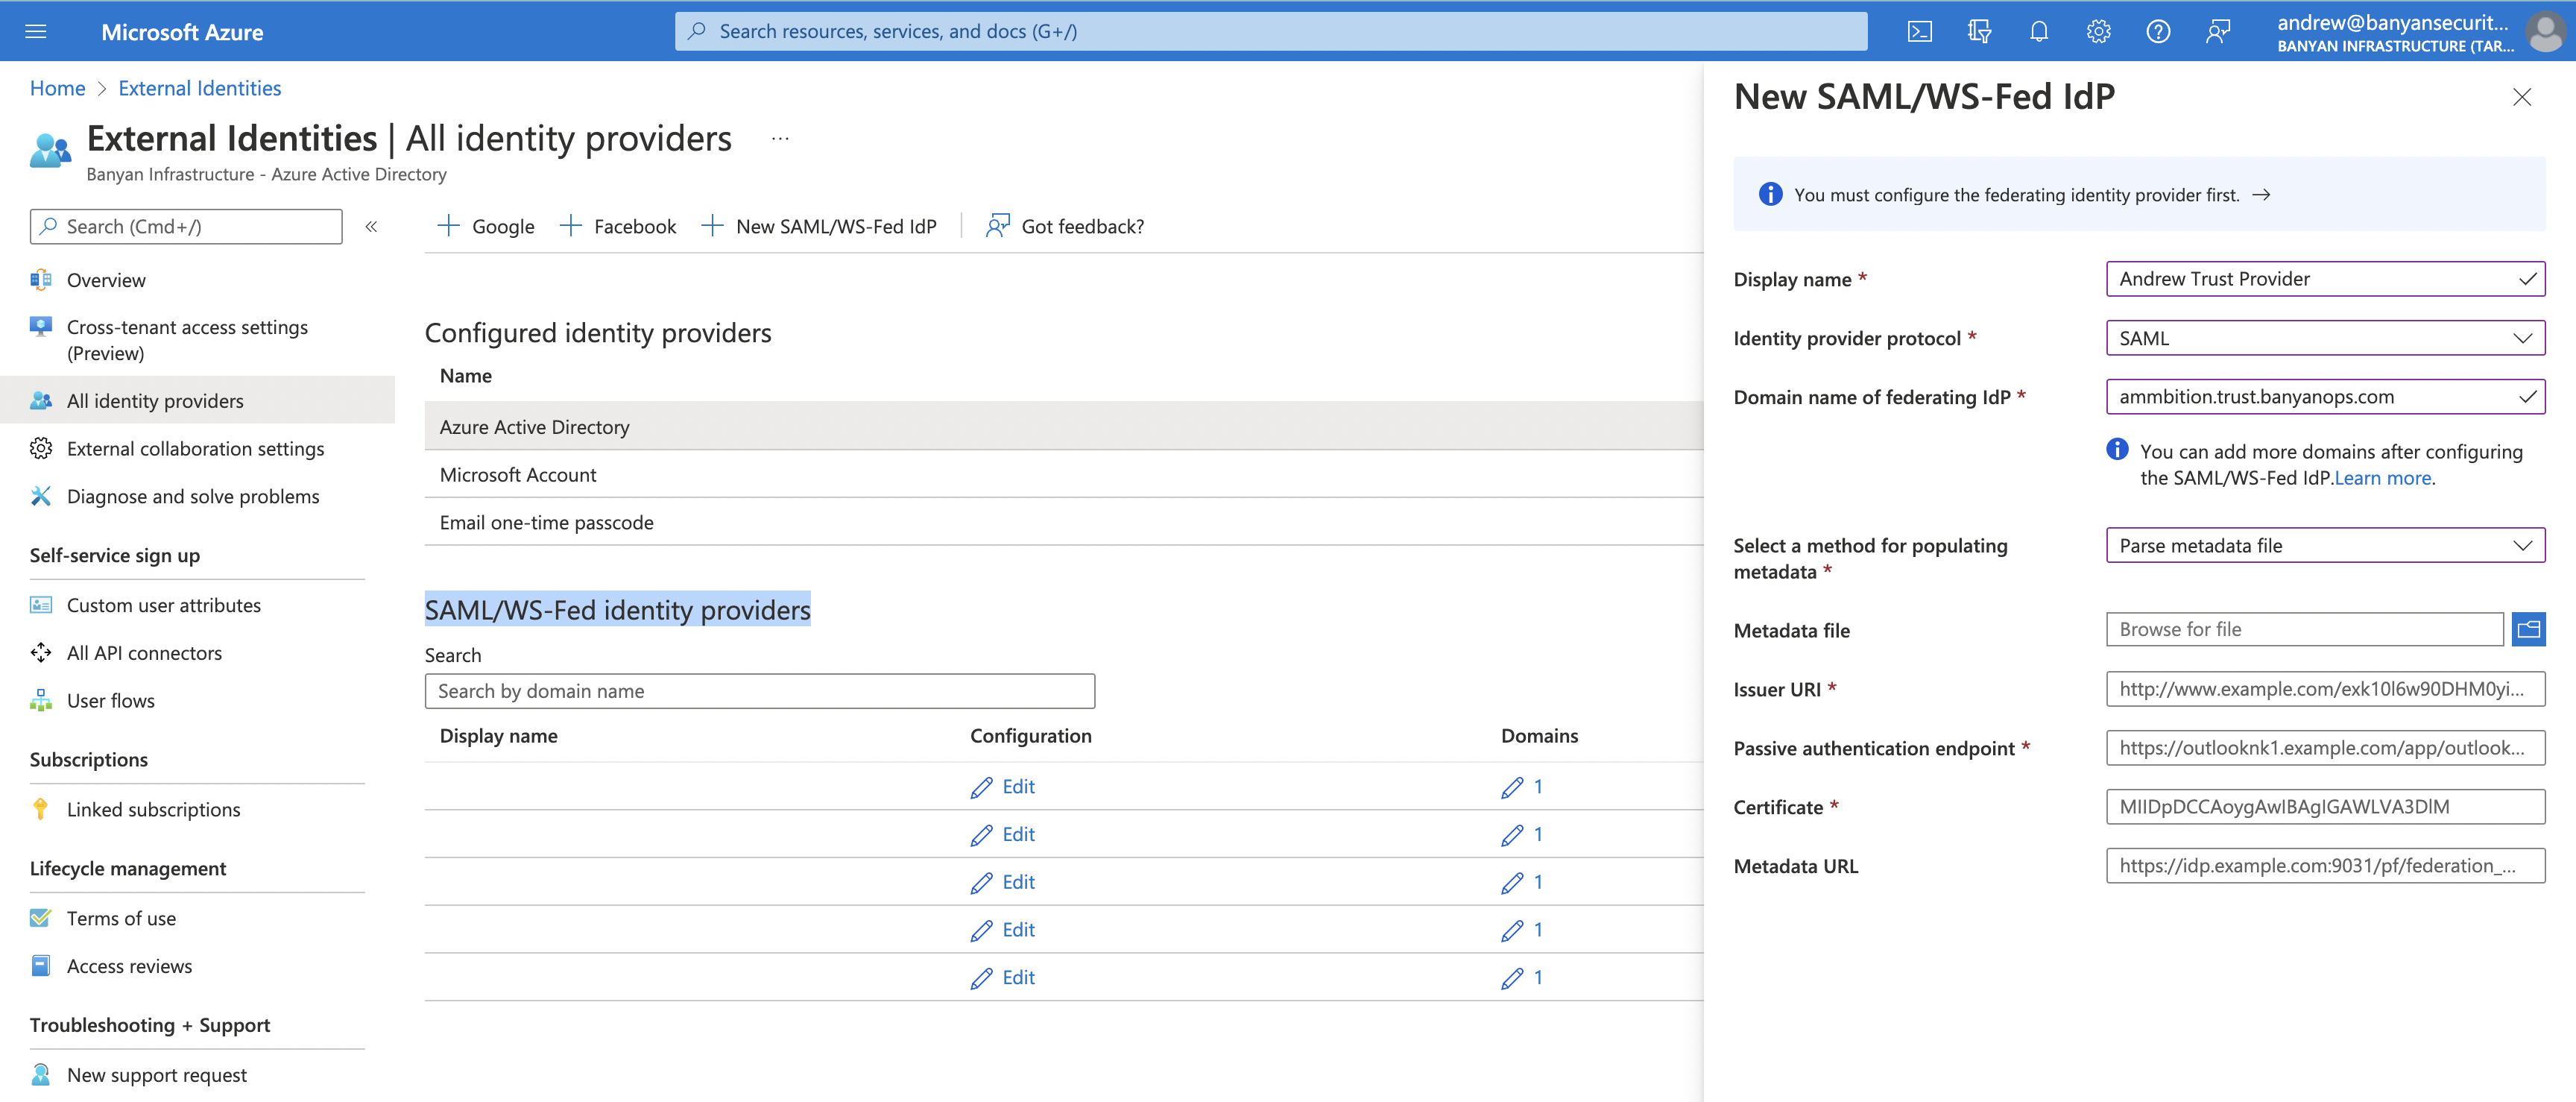
3.7 Under Select a method for populating metadata, select Parse metadata file.
3.8 Select folder icon for Metadata file, and locate BanyanMetadata.xml created in Step 3.2.
3.9 Select Save.
Banyan Trust Provider IDP should now exist in the SAML/WS-Fed identity providers table.
Step 4: Configure AAD custom domain with a Federated Identity Source
4.1 Copy the following code block and provide the inputs marked by <> (explained below).
Note: Azure AD does not have a GUI to configure the Federation.
This code block will be run with a powershell module to configure the specified custom domain.
$dom = "<domain>”
$BrandName = "Banyan Trust Provider"
$LogOnUrl = "<passive authentication endpoint>"
$ecpUrl = "<passive authentication endpoint>"
$MyURI = "<metadata url>"
$MySigningCert = "<metadata cert>"
$uri = "<passive authentication endpoint>"
$Protocol = "SAMLP"
Set-MsolDomainAuthentication `
  -DomainName $dom `
  -FederationBrandName $BrandName `
  -Authentication Federated `
  -PassiveLogOnUri $LogOnUrl `
  -ActiveLogOnUri $ecpUrl `
  -SigningCertificate $MySigningCert `
  -IssuerUri $MyURI `
  -LogOffUri $LogOffUrl `
  -PreferredAuthenticationProtocol $Protocol
domain: the custom domain you are federating with Banyan.
passive authentication endpoint: within the Banyan metadata, locate the SingleSignOnService URL. The URL requires all the sub directories.
- Example - the passive authentication endpoint is highlighted:

metadata url: the URL from provided in Banyan (Step 3.1).
metadata cert: the first x509Certificate located in the metadata file (downloaded in Step 3.2).
4.2 Connect to your Azure AD as a Tenant Administrator through powershell via Connect-MsolService.
4.3 Run the code block (from Step 4.1) with all variables changed to the required attributes.
Note: This will immediately change the domain listed to a federated domain with Banyan, forcing users to Banyan for authentication.
To quickly revert this, change the -Authentication variable in the code block (in Step 4.1) from Federated to Managed. Re-run the code block with the change to revert.
Can’t find what you’re looking for?
We’re happy to help. Contact our team.